3. Install Operating System
Windows 7 Enterprise will be the base operating system onto which all the other software will be installed.
We will refer to it as the host operating system.
You need the Enterprise (or Ultimate) version because that version comes with a systems service that the edX platform needs, called Client for Network File System (NFS).
Windows 7 Professional, and other versions of Windows 7, do not come with this NFS service.
You can buy a copy of Windows 7 Enterprise from Microsoft, a retail store, or online.
You can also download a 90 day evaluation copy of it from Microsoft here:
http://www.microsoft.com/en-us/evalcenter/evaluate-windows-7-enterprise
Install Windows 7 Enterprise and Enable (NFS)
To install the Client for Network File System (NFS) service, we can do the following:
Install Windows 7 Enterprise as normal.
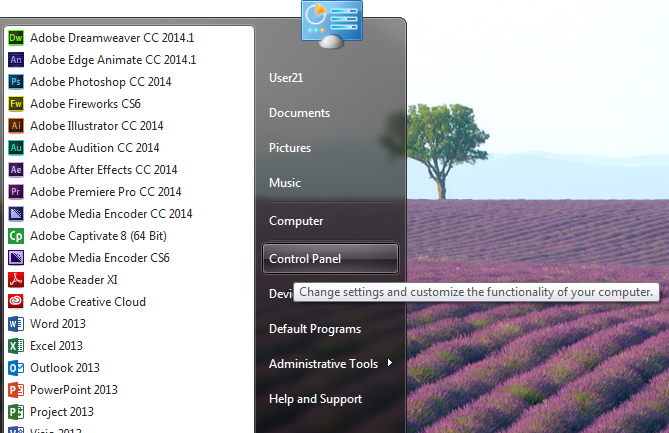
Click the Start button at the bottom left of the Windows Start menu, find “Control Panel” on the right side of the Menu Selection Panel, and CLICK it.
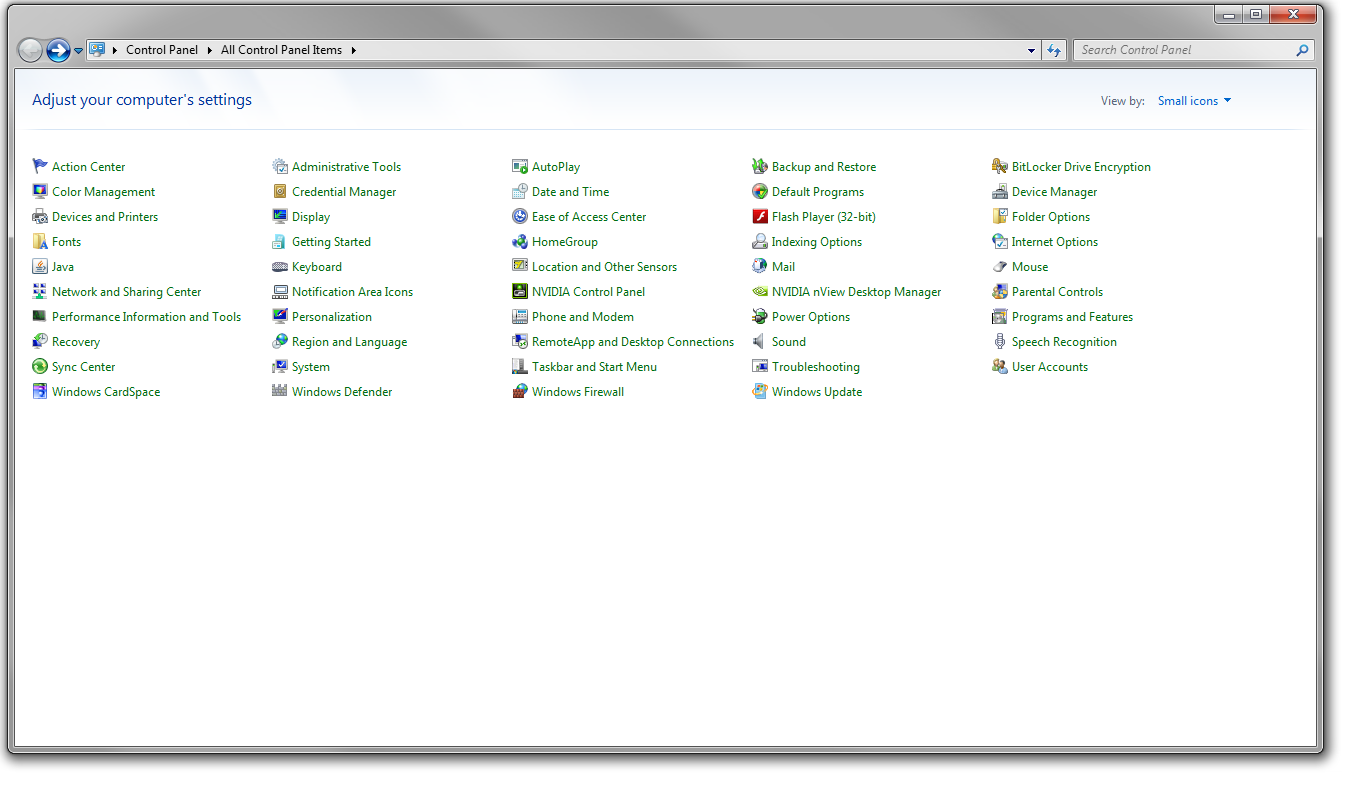
Within the Control Panel, find the “Programs and Features” selection, and CLICK it.
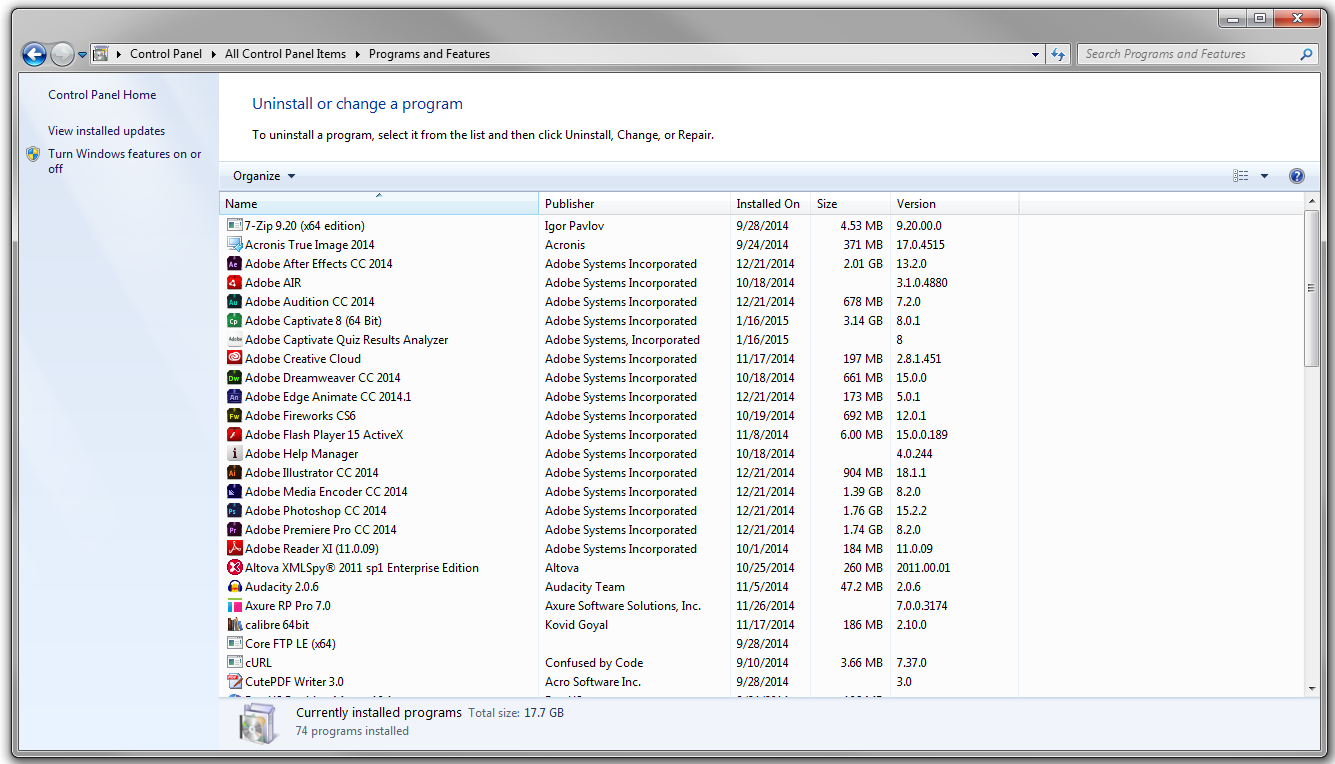
Within Programs and Features, find “Turn Windows features on or off”, on the left panel, and CLICK it.
Scroll through the list until you locate “Services for NFS”.
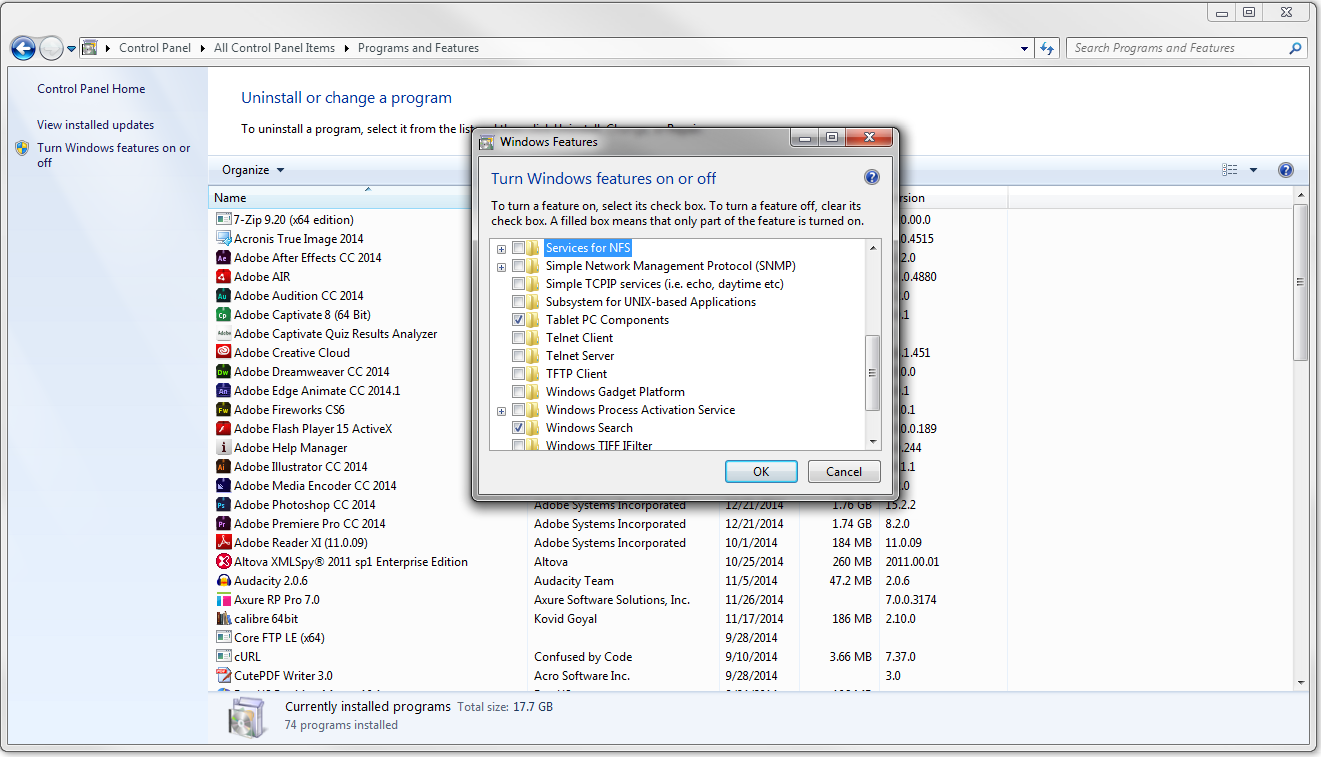
CLICK the + plus sign to display both available options, and then CLICK all three checkboxes.
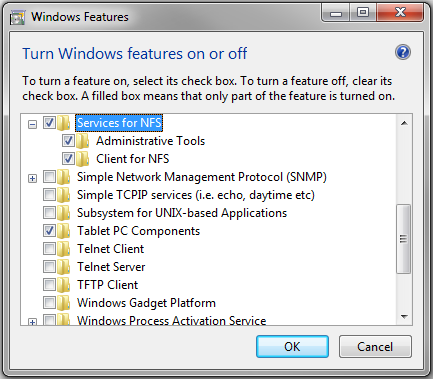
CLICK the OK button to enable all the Services for NFS, including the Client for NFS service.
Reboot the computer.
That completes the process for enabling Windows 7 Enterprise’s NFS services.